Let’s face it, a website with the domain name “www.example.com” gives your brand a lot more authority than a website with a domain name “example.wordpress.com” or “example.blogspot.com”. Why? Because the first example is unique (and costs money), while the two latter ones are free domain names. They both have subdomains (WordPress, Blogspot) in the URL which indicates that the website is hosted for free by those platforms.
At the end of the day, a free domain name will never be taken seriously because serious people pay for their businesses.
It’s really no different with email addresses. Mostly I see website owners having their own unique business email addresses that belong to them, such as support@example.com or info@gedground.com, which is the case with my blog.
However, I also sometimes find websites that do not have their own business email address. Instead, they use something like example@gmail.com or gedground@hotmail.com.
These two email addresses, just like free domain names, also take away from credibility. It is as if their owners either don’t know how to create their own domain email address, or they aren’t bothered (don’t want to pay). Both options send a negative signal to their potential clients and partners.
Download our FREE guide >>>7 SMART STRATEGIES TO GROW YOUR BLOG TRAFFIC FASTER!<<<
How to create a domain email address for free
No more theory. Let’s get into what you actually came here for, which is how to create a domain email address for free.
And by the way, “free” means here a custom email address (i.e. support@example.com). It means that you have already paid for a hosting provider and a custom domain name, and you now want a free custom email address linked to your website without paying extra.
Most hosting providers offer a free custom email address. All you need to do is to set it up.
I will be using Bluehost to demonstrate the setup. It’s the provider I use. The setup with other providers is pretty much the same, you just need to know where to look.
After we have created your business email address, I will show you how you can link it directly to your Mac’s Mail application (or iOS).
Recommended: What Is the Best Blogging Platform and Why
Step 1. – Hosting provider’s dashboard and the email section
As I already mentioned, many hosting providers offer a domain name and a custom email address for free.
For Bluehost, click here.
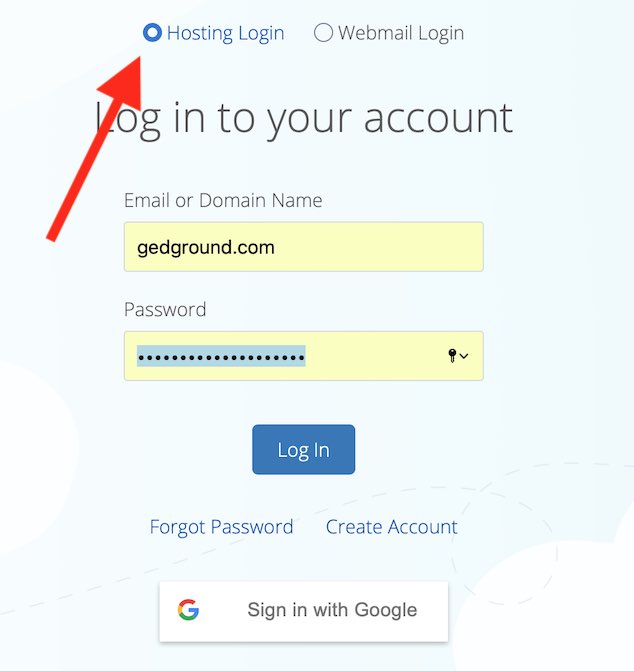
Then click the Login button at the top bar of the website. You will then be asked to enter your username and password. Do it for the Hosting Login tab as shown in the image below.
If you have setup up two-factor authentication, you will be asked to enter the token. If not, you will now be inside your Bluehost dashboard.
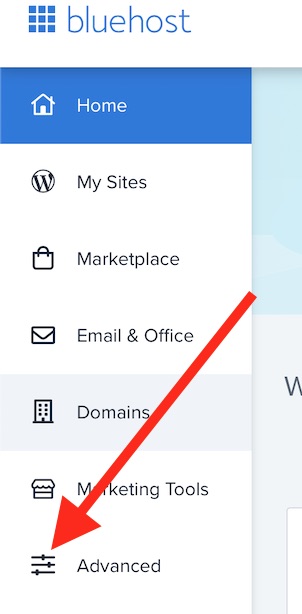
Then click on the Advanced tab.
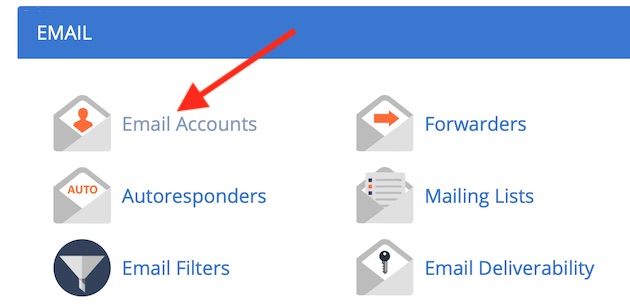
Then locate EMAIL and click Email Accounts.
Step 2. – Creating your Bluehost email account
Click on the +CREATE button.
Now you will find yourself in the CREATE AN EMAIL ACCOUNT section. This is where you fill in the basic data.
In this example, I will use support@gedground.com as the username. You pick whatever you want. Typically at first, you would go for support@example.com or info@example.com. You can also create a firstname.lastname@example.com email if there are two or more people in your business.
The password section holds the password for that specific email. You will need it later as well when you connect this email to your Mac.
For storage, set it to 100MB if you are on the BASIC plan. More than 100MB comes with an extra fee on Bluehost.
I also pick the Automatically Create Folders option for simplicity.
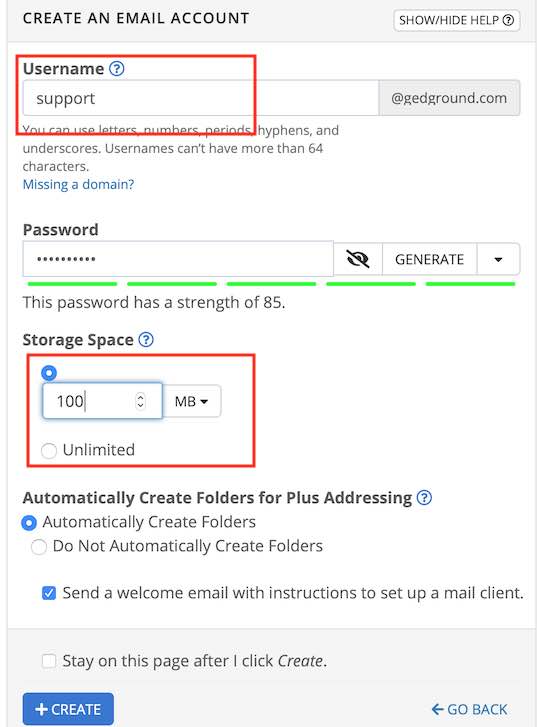
Click on the +CREATE button and stay on the next page.
Congratulations! You’ve created your own custom domain email address. 😊
Now that you know how to create a domain email address for free, let’s proceed with connecting it to your Mac so that you could access all of your business/blog emails directly from the default Mail app.
Recommended: How to Create an Email List for Your Blog (And Which Tool to Use)
How to connect your domain email address to your Mac
Step 1. – Download the settings file
There are certain settings that you would need to enter into your Mac’s Mail app in order for everything to work. You could do this manually, of course, but I have noticed that things don’t always go smoothly that way.
So let’s take the easier route and download the settings file.
Click on the CONNECT DEVICES option.

Click on the IMAP over SSL/TLS option.
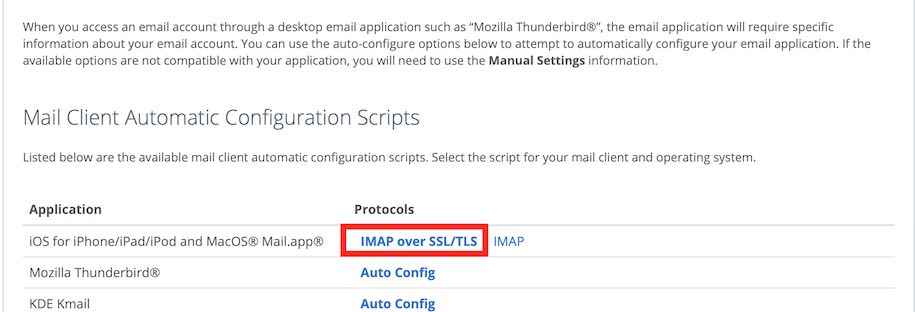
Click on Proceed.
Your browser will now download a file called “support@gedground.com Secure Email Setup.mobileconfig” (your file will be using your domain name). If your computer doesn’t run the file automatically, locate that file and run it yourself.
Step 2. – Linking the Apple Mail app with your new custom email address
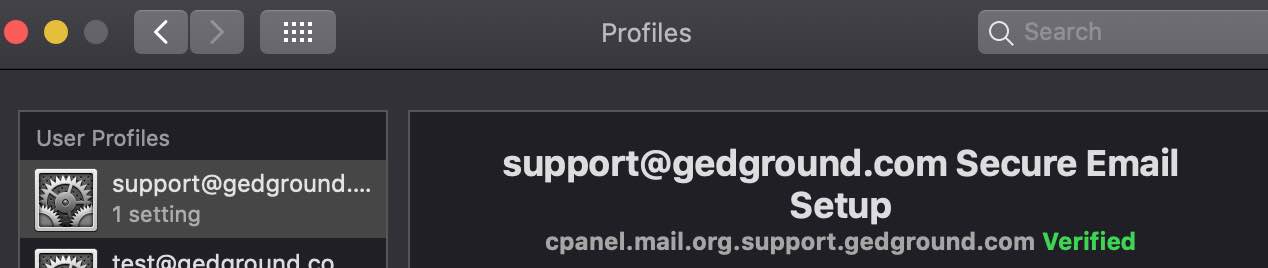
Your Mac should now ask you if you want to install the support@gedground.com Secure Email Setup.
Click Continue.
At this point, your Mac will ask you for the password that you created for your new email address at the beginning of this tutorial.
Type in that password and click Install.
You will now see a message in green saying Verified. If so, yaaaaaaaaay! Congratulations again!
As already mentioned, the process is the same for other Apple devices. Download the setting file and run it on your iPhone/iPad.
Now, to finalize your success, try emailing your new business email address and see if you receive the message on your Mac. If you do, great!
Download our FREE guide >>>7 SMART STRATEGIES TO GROW YOUR BLOG TRAFFIC FASTER!<<<
So this was it for today. You learned how to create a domain email address with Bluehost for free and how to link that email address to your Apple devices, to the Mail app.
If you have any questions for me concerning the process of creating a free domain email address, just let me know in the comment section below.
Also, if there are any other tutorials you want me to do of a similar kind related to WordPress or blogging, just let me know. I appreciate your feedback 🙂
Thank you for stopping by and good luck!
Please click below to subscribe and follow us on social media:
Click here to follow us via E-mail!
Click here to follow us on Facebook!
Click here to follow us on YouTube!
Click here to follow us on Instagram!
Click here to follow us on Twitter!
Click here to join our Facebook group!

 15 Best Inspirational Movies That Teach to Never Give Up
 50+ Best Self-Help Books That Will Change Your Life Forever
 Short Motivational Stories of Failure and Success That You Must Know
 What to Do When Someone Is Better Than You? – Dealing with Jealousy
 10 Examples Where the Power of Positive Thinking Kicks Ass!
Leave a Reply